Fun with HTML

Advertisements

Hello everybody,

Michael here, and in this lesson, I thought I’d run it back to a topic I haven’t covered much lately-web development and specifically HTML.

Now, in the way, way past of 2021-2022 I covered some basic HTML concepts like table design and list creation. However, now that I’ve introduced you to the basics, I thought we can have some fun with HTML these next few posts!

<html>Basic outline of website</html>

Before we try out any of the fun new features of HTML, let’s first design the basic website:

<html>
    <body>
        <h1>Michael Plays Around With HTML</h1>
        <h2>In this website, Michael will play around with some cool HTML Easter eggs!</h2>   
    </body>
</html>

Simple enough website outline, right? Here’s what it looks like (on Chrome):

<body><h1>One thing I should note</h1></body>

Before we explore some cool HTML Easter eggs, I think this is worth mentioning. Back in my original series of HTML/CSS content, I was using Atom Text Editor to help me create my content. However, Atom Text Editor reached end-of-life in December 2022. This means that while you can technically still use Atom for your HTML/CSS needs, you would need to work with an older version as no new updates/patches will be released for Atom.

With that said, from here on out, I’ll be using Microsoft Visual Studio Code for any HTML/CSS lessons (it’s not the same thing as Microsoft Visual Studio that I used for my recent C# content). Here’s the link to install it-https://code.visualstudio.com/-like Microsoft Visual Studio, this software is open-source.

Also, once you’ve installed Microsoft Visual Studio on your device and have your code set up, here’s how to run the code:

On the ribbon on the top of the screen, click the Run button and you can either select Start Debugging (F5 shortcut key for Windows devices) or Run Without Debugging (CTRL + F5 shortcut key for Windows devices).

<p>The juicy HTML Easter eggs</p>

Now that we’ve got a very basic website, let’s have some fun with HTML easter eggs, shall we?

First off, let’s add an HTML color picker to our webpage:

<label for="colorpickertest">First, pick a HEX color, any color:</label>
<input type="color" id="colorpickertest" value="#ff0000">

As you can see, below the header that begins In this website..., I added a color-picker along with the label First, pick a HEX color, any color:.

One thing to note about the color-picker (denoted in the <input> tag)-you can use any color as the default, but it must be in HEX format. I used my favorite color red, which is represented in HEX code as #FF0000. If you don’t specify a default color that you’d like to use, black (HEX code #000000) will be the default color.

  • Even though the default color you want to use for the color-picker must be in HEX format, the color picker itself gives you the option of viewing colors in HEX, RGB or HSV formats.
  • For a refresher on color systems in programming, please check out my post Colors in Programming.

<datalist>Autocomplete

The next HTML Easter egg we’ll explore is the use of auto-complete:

<p>Which Marvel character is your favorite?</p>
<input list="heroes">
<datalist id="heroes">
    <option>M'Baku</option>
    <option>Mordo</option>
    <option>Maximoff</option>
    <option>Magneto</option>
    <option>Malekith</option>
    <option>Mantis</option>
 </datalist>

In this example, I have a seemingly-ordinary HTML dropdown with the header Which Marvel character is your favorite? followed by the names of six random Marvel characters.

However, when I type Ma into the search bar, I see the dropdown auto-populate with the names of the four Marvel characters in the list that start with Ma (sadly I couldn’t grab a screenshot of this).

  • As impressive as it might be, unfortunately I cannot program the autocomplete to gather your whole search history. I don’t have the AI capabilities of Google, but wouldn’t that be something?

<p>Feel free to write anything</p>

Now if you have a basic grasp of HTML, you’ve probably seen the </p> tag. However, let me show you something cool you can do with the <p> tag:

<p contenteditable="true">Feel free to edit this content.</p>

This is just like the regular <p> tag in the sense that you can create regular HTML paragraphs, but with one notable exception in the form of contenteditable. Adding this parameter to the <p> tag and setting its value to true will create a freeform text space, where you can edit the paragraph as much as you’d like.

  • Honestly, I think it’s a good idea to include the placeholder text (Feel free to edit this content in this example) as a default.

Now, here’s the paragraph with the default text:

And here’s the paragraph after I edit the text:

Pretty neat, eh?

<progress> & <meter>

For my last pair of HTML Easter eggs, let’s explore the <progress> bar and <meter> bar.

First, we explore the progress bar:

<label for="testbar">Percent of 2025 complete:</label>
<progress id="testbar" value="39" max="100"> 39% </progress>

And here’s the progress bar:

As you can see, we have a simple blue progress bar that appears to be 39% filled. How did I make the progress bar look like its shown on the webpage? In the <progress> tag, I set the value of the <value=> parameter to 39 and the value of the <max=> parameter to 100.

Next, let’s check out the <meter> bar:

<label for="testmeter">Current phone charge:</label>
<meter id="testmeter" min="0" low="0.15" high="0.85" max="1" value="0.92">92%</meter>

In this example, I created a <meter> with five parameters-the id (linking the meter to the above <label>), the min (lowest possible value for meter), the low (along with min, represents lower end of meter range), the high (represents higher end of meter range), and the max (highest possible value for the meter).

The <meter> tag acts similarly to the <progress> tag in the sense that both, in a way, represent percentages of something (whether phone charge, grade, you name it). However, one thing that sets the <meter> tag apart is that it can change its color based on its current value.

Let’s demonstrate the color-changing ability of the <meter> on the same code snippet:

<label for="testmeter">Current phone charge:</label>
<meter id="testmeter" min="0" low="0.15" high="0.85" max="1" value="0.66">66%</meter>

Since I changed the meter’s value to 0.66, the color changed to green. This effect will only work if you have a low and high value defined, as the meter’s green display will only work if the current value is between a defined low and high value.

  • Just to note-using min="0" low="0.15" high="0.85" max="1" value="0.66" or min="0" low="15" high="85" max="100" value="66" would have the same effect on the meter.

Here’s the code for today’s post on my GitHub-https://github.com/mfletcher2021/blogcode/blob/main/coolhtmlthings.html.

Thanks for reading!

Michael

static void C# method: (lesson on methods)

Advertisements

Hello everyone,

Michael here, and in today’s post, we’re going to build upon what we learned in the previous post on C# classes and objects-new C# class.

In this post, we’ll use the same base code as we did in the previous post, but we’re going to build upon what we’ve learned by adding methods into the classes we’ve built!

What is a C# method?

Before we actually get into the method-making, as a quick refresher, what is a method? In programming, a method is a set of instructions for a program to execute when the method is called in the script.

static void C# method

With that quick refresher, let’s dive right in to creating C# methods. We’ll add our methods to the https://github.com/mfletcher2021/blogcode/blob/main/Cat.cs script we developed in the previous post.

First off, let’s explore a simple static void () method.

static void meow()
{
   Console.WriteLine("meowmeowmeowmeow");
}

In this simple method, I’m telling the console to output the line "meowmeowmeowmeow" every time this method is called.

Now why is it a static void method? static indicates that this method belongs to the Cat class while void indicates that this method doesn’t have a return type.

static void Main()

Yes, as you may have noticed, the Main() method in C# is also a static void method. Why might that be? The Main() method acts as an entry point to execute the program; this method sets variables and executes all the method calls for running the script. Since the Main() method doesn’t return anything, static void() would be the most appropriate type to use for this method.

meow();

So, how do we call the method? Here’s how:

class Cat
{
    string color = "orange";
    int age = 11;
    string gender = "male";

    static void meow()
    {
        Console.WriteLine("meowmeowmeowmeow");
    }

    static void Main(string[] args)
    {
        Cat orangeCat = new Cat();
        Console.WriteLine(orangeCat.age);
        meow();
        meow();

    }
}

11
meowmeowmeowmeow
meowmeowmeowmeow

In the Main() method, simply write the name of the method followed by a semicolon-meow(); in this case. Yes, you can call the method as many times as you want in the Main() method-I did call meow(); twice indicating that there’s a very meowy orange cat.

calculateHumanAge(with parameters)

Now that I’ve shown you how to create a basic method, let’s try something a bit more advanced. This time, let’s see how we can create a method with parameters:

static void calculateHumanAge(int age)
    {
        Console.WriteLine("The cat is " + age * 7 + " in human years.");
    }

In the calculateHumanAge method, I pass in a parameter-int age and output a line that says The cat is (age*7) in human years, which multiplies the number I used in the method by 7.

  • Notice how the method type is still void-this is because we’re not returning anything from the method (Console.WriteLine() isn’t considered a return value). More on return values later.
  • Methods can have as many parameters as you want, but you’ll need to remember to include all of them whenever you call the method. You’ll also need to include value types for each parameter (e.g. string, int and so on).

Let’s try it out in our code!

class Cat
{
    string color = "orange";
    int age = 11;
    string gender = "male";

    static void meow()
    {
        Console.WriteLine("meowmeowmeowmeow");
    }

    static void calculateHumanAge(int age)
    {
        Console.WriteLine("The cat is " + age * 7 + " in human years.");
    }

    static void Main(string[] args)
    {
        Cat orangeCat = new Cat();
        Console.WriteLine(orangeCat.age);
        meow();
        meow();
        calculateHumanAge(11);

    }
}

11
meowmeowmeowmeow
meowmeowmeowmeow
The cat is 77 in human years.

When I call the calculateHumanAge method in the Main method and pass in 11 as a parameter, I get the output The cat is 77 in human years., indicating that the method did multiply the integer parameter by 7 before outputting that string.

string nameBackwards (return something)

Last but not least, let’s examine method return values.

static String nameBackwards(string name)
    {
        char[] nameList = name.ToCharArray();
        String reversedName = String.Empty;

        for (int i = nameList.Length - 1; i >= 0; i--)
        {
            reversedName += nameList[i];
        }

        return reversedName;
    }

In the nameBackwards method, we’ll take a String parameter and return that same string printed backwards. We will accomplish this by first creating a character array consisting of each character in the name string, then creating a reversedName string by essentially writing each character in the nameList array in reverse order. We will then return the reversedName string in the method.

  • Yes, C# has a pretty unusual method to initialize empty strings. Instead of doing something like testString = '' like you would do in Python, you would write something like String testString = String.Empty (special emphasis on the String.Empty part).

Let’s see the output!

class Cat
{
    string color = "orange";
    int age = 11;
    string gender = "male";

    static void meow()
    {
        Console.WriteLine("meowmeowmeowmeow");
    }

    static void calculateHumanAge(int age)
    {
        Console.WriteLine("The cat is " + age * 7 + " in human years.");
    }
    
    static String nameBackwards(string name)
    {
        char[] nameList = name.ToCharArray();
        String reversedName = String.Empty;

        for (int i = nameList.Length - 1; i >= 0; i--)
        {
            reversedName += nameList[i];
        }

        return reversedName;
    }

    static void Main(string[] args)
    {
        Cat orangeCat = new Cat();
        Console.WriteLine(orangeCat.age);
        meow();
        meow();
        calculateHumanAge(11);
        Console.WriteLine(nameBackwards("Simba"));

    }
}

11
meowmeowmeowmeow
meowmeowmeowmeow
The cat is 77 in human years.
abmiS

In this example, I passed in the string Simba as the parameter for the nameBackwards method and got the backwards string abmiS as the return value-yes, the nameBackwards method will keep the upper-and-lower-casing of the original input string intact.

  • Since I didn’t see the output when simply writing nameBackwards("Simba"), I wrapped this method call inside a Console.WriteLine() method call to see the output.

Today’s script can be found on my GitHub at the following link-https://github.com/mfletcher2021/blogcode/blob/main/CatMethods.cs.

Thanks for reading!

Michael

A Very Cool Byte-Sized Python Demonstration!!!

Advertisements

Hello everyone,

Michael here, and in today’s post, we’re gonna do a very cool byte-sized Python demo! You ready? Here goes!

print("Hello World")
print("¡Hola, Mundo!")
print("Bonjour, le Monde!")
print("Hallo, Welt!")
print("Olá, Mundo!")
print("Nǐ hǎo, shìjiè!")
print("Bonjou, Mond!")
print("Sawasdee, Loke!")
print("Hello, Duniya!")
print("Habari, Dunia!")

Hello World
¡Hola, Mundo!
Bonjour, le Monde!
Hallo, Welt!
Olá, Mundo!
Nǐ hǎo, shìjiè!
Bonjou, Mond!
Sawasdee, Loke!
Hello, Duniya!
Habari, Dunia!

Wow, take a look at this! Hello world in 10 languages from across the world (English, Spanish, French, German, Portuguese, Mandarin, Creole, Thai, Urdu, and Swahili, respectively).

That’s it-that’s the demo!

Thanks for reading and also,

HAPPY APRIL FOOLS

  • Hey, my tagline does promise byte-sized programming classes for all coding learners ;-). A blogger’s got to stay true to his word right?

new C# class

Advertisements

Hello everybody,

Michael here, and today’s post will cover classes in C#.

What is a C# class? Better yet, what is a programming class in general?

If you’ve learned other programming languages, you’ll certainly have encountered this concept. However, in case you need a refresher, C#, like Java and Python (and possibly many other languages) is what’s known as an object-oriented programming language. Just like with Java and Python, everything comes in classes and objects. All those classes and objects come with their own methods and attributes.

new C# class

Now, how do we construct a C# class? Take a look at this example below:

class Cat
{
    string color = "orange";
    int age = 11;
    string gender = "male";

    static void Main(string[] args)
    {
        Cat orangeCat = new Cat();
        Console.WriteLine(orangeCat.age);

    }
}

11

In this simple Cat class, we have three attributes-color, age, and gender. We also created an object of the Cat class in the Main() (yes C# capitalizes the word Main) method called orangeCat and accessed its age attribute with the following code-orangeCat.age-which returns the value of 11.

  • To access any attribute of a C# object, remember the following syntax: objectname.attributename.

Easy enough right? Now let’s see some new C# class tricks!

new C# class (no default values)

Now, how do we create a C# class with no default values? Let’s take a look:

class NewCat
{
    string color;
    int age;
    string gender;

    public NewCat(string catColor, int catAge, string catGender)
    {
        color = catColor;
        age = catAge;
        gender = catGender;
    }

    static void Main(string[] args)
    {
        NewCat brownCat = new NewCat("brown", 11, "female");
        Console.WriteLine("This is a " + brownCat.color + " cat who is " + brownCat.age + " years old and is a " + brownCat.gender);

    }
}

This is a brown cat who is 11 years old and is a female

In this example, I didn’t declare default values for color, age, and gender. Instead, I used a special method called a constructor to allow any object of the Cat class to be initialized with any possible value for each attribute. The constructor must have the same name as the class (Cat in this case) and can contain as many parameters as you want (3 parameters in my case for color, age, and gender).

Notice how I still declared the color, age, and gender variables before the constructor even though I use these same three variables inside the constructor. Why might that be? The first time I mention color, age and gender, all I did was declare that these variables will be a part of this Cat class. However, when I mentioned them again in the constructor, I actually initialize them to whatever the values of catColor, catAge and catGender are set to in the parameters.

  • Remember that before you initialize a variable with a constructor, you must first declare it!
  • Even though I didn’t give any default values for each variable, I can still access each variable in the same manner I did in the previous example (e.g. objectname.attributename).
  • Yes, since I stored each example as a separate script in the same directory, I used the name NewCat for this class. Keep in mind that if you’re going to create multiple classes in the same directory, you must use different names for each class.

Here are the links to both of today’s scripts in my GitHub:

Thanks for reading,

Michael

For (A Lesson; On C#; Loops)

Advertisements

Hello readers,

Michael here, and today’s post will be all about loops in C#. We’ll go over the for-loop, foreach-loop and while-loop!

If you learned about loops through some of my previous programming tools, great! However, for those who may not know, loops in programming are simple sets of directions for the program to repeat X amount of times until a certain condition is met.

For (A Piece; On C#; Loops)

The first type of loop we’ll cover is a simple C# for loop. Here’s an example of a C# for loop:

for (int m = 5; m <= 30; m+=5)
{
    Console.WriteLine(m);
}

5
10
15
20
25
30

In this loop, I have the for (statement 1; statement 2; statement 3) with the respective statements being int m = 5 (setting initial loop value to 5), m <= 30 (setting the loop-ending condition to the point where m is less than or equal to 30), and m+=5 (indicating that m should be incremented by 5 during each loop iteration). After the for statement, I have the body of the loop, which prints out each successive value from 5 to 30 in increments of 5.

  • Just so you remember, the three statements in a C# for loop are (in order) the initial value-setter, the loop-ending condition, and the action that should be performed during each loop iteration. Also, the statements in the for loop need to be separated by semicolons.

Foreach (Lesson in Loops)

The next type of C# loop we’ll iterate through (coder joke) is the foreach loop. Here’s an example of a foreach loop below:

string[] states = ["Tennessee", "Florida", "California", "New Mexico", "Arizona", "Ohio", "Indiana"];

foreach (string s in states)
{
    Console.WriteLine(s);
}

Tennessee
Florida
California
New Mexico
Arizona
Ohio
Indiana

In this example, I’m iterating through the states array using the foreach loop. Unlike the for loop, the foreach loop only requires one statement-(array type element in array). In this statement, you’ll need to include the array type, indicator value for each element in the array (s in this case) and the name of the array. In this case, I used foreach (string s in states).

While (C# Loop Runs)

Last but not least, let’s explore C# while loops. You may recognize while loops from other programming tools you know about (like Python) and in C#, while loops do the same thing-run the loop over and over WHILE a certain condition is True.

Here’s an example of a simple C# while loop:

int o = 2;

while (o <= 100)
{
    Console.WriteLine(o);
    o *= 2;
}

2
4
8
16
32
64

In this example, we have a simple C# while loop that sets the initial value-o-to 2. The loop will then multiply o by 2 for each iteration until o hits the highest possible value allowed by the loop condition. In other words, o will keep multiplying itself by 2 until it gets to 64, as 64*2 (128) will end the loop as 128 is greater than 100.

Now, how would you structure a C# while loop? The syntax is quite simple-while (condition to keep loop running) { code block to execute }.

Do (Loop Code) While Loop = Running

So we just explored the C# while loop. However, did you know there’s a variation of the C# while loop called the do-while loop. It works just like a while loop with one major difference-do-while loops will always be executed at least once as they always check whether the condition is still true before performing the next loop iteration. Here’s our while loop example from above converted into a do-while loop

int f = 2;

do  
{
    Console.WriteLine(f);
    f *= 2;
} 
while (f <= 100);

2
4
8
16
32
64

How would you structure a do-while loop. Easy-do { code block to execute } while (condition to test loop)! As you can see from the output, our do-while loop returned the same six values as our while loop above.

For (Infinite; Loop; Encounters)

Yes, just as with other languages we’ve covered (Python and R for two), it is possible to have the infinite loop encounter in C# as well. Here’s an example of that:

while (true)
{
    Console.WriteLine("Michael's Programming Bytes");
}

The loop above is a simple example of an infinite C# loop. Since the while (true) statement will never stop the loop, it will just keep going, and going, and going…unless of course you write a break statement in the loop to stop it after X iterations or something like that.

For (Nested; Loops) For (In; C#)

Yes, it is possible to have nested loops in C#, just as it’s possible to have nested loops in other programming languages. Here’s a simple example of a C# nested loop:

for (int t = 2; t <= 20; t*=2)
{
    for (int n = 5; n <= 30; n+=5)
    {
        Console.WriteLine(t * n);
    }
}

10
20
30
40
50
60
20
40
60
80
100
120
40
80
120
160
200
240
80
160
240
320
400
480

This loop will print out all possible products of t and n through each iteration of the nested loop pair. The outermost loop-the one with t-runs first while the innermost loop-the one with n-runs second. The reason you see 24 outputs on this page is because the amount of iterations a nested loop has is the product of the amount of iterations for each individual loop. In this case, since the t loop runs four times and the n loop runs six times, we get 24 total iterations of the nested loop (4*6=24).

Here’s the link to the script for today’s post on my GitHub-https://github.com/mfletcher2021/blogcode/blob/main/Loops.cs. Note that I did include the infinite loop example here but if you want to effectively test the other loops, you can “turn off” the infinite loop simply by commenting it out of the code.

Thanks for reading,

Michael

[“C#”, “Arrays, “Lesson”][“part”, “2”, “multi-dimensional arrays”]

Advertisements

Hello everyone,

Michael here, and in a continuation of our previous lesson, today we’ll explore more about C# arrays-this time with a focus on multi-dimensional arrays.

[“basics”, “of”][“multi-dimensional”, “arrays”]

So, what is a multi-dimensional array in the context of C#? To put it simply, a C# multi-dimensional array is two or more 1-dimensional arrays put together. Here’s an example of one:

int[,] years = { { 2018, 2020, 2022, 2024 }, { 2019, 2021, 2023, 2025 } };
Console.WriteLine(years[0, 2]);

2022

This is a simple, 2-dimensional array in C#. It’s conceptually similar to 2-dimensional (or multi-dimensional arrays for that matter) in languages like Java or Python, but there are things worth noting for multi-dimensional arrays in C#:

  • To initialize a multi-dimensional array in C#, use the following syntax: data type[,] name of array.
  • The , in between the square brackets indicates the number of dimensions the array will have. For instance, one comma indicates a 2-dimensional array, two commas indicate a 3-dimensional array, and so on.
  • Each individual array-with-the-array needs to use curly brackets {} instead of square brackets []. It’s just one of those C# things.
  • Just like with 1-dimensional C# arrays, multi-dimensional C# arrays use a 0-based indexing system. However, to access an element of a multi-dimensional C# array, this is the correct syntax-years[0,2]-not this-years[0][2].

[“modifying][“multi-dimensional arrays”]

Now, what if we want to modify an element in a multi-dimensional C# array? Here’s how we can do so:

years[1, 3] = 2027;
Console.WriteLine(years[1, 3]);

2027

In this example, I’m changing the fourth element in the second dimension of this array from 2025 to 2027. Just as I did when I changed elements in the 1-dimensional array, I referenced the index of the element that I wanted to change and assigned the new value I wanted to use to that index.

[“other”, “questions”][“about”, “multi-dimensional arrays”]

Now, you’ll likely have other questions about multi-dimensional arrays in C#. First of all, can you sort them like you can with 1-dimensional C# arrays. The short answer to that-no:

Console.WriteLine();
Array.Sort(years);
foreach (int y in years)
{
    Console.WriteLine(y);
}

As you can see from the error message, you can only sort single-dimensional arrays in C#. Presumably, that means you can’t reverse-sort C# arrays right? Correct!

Console.WriteLine();
Array.Reverse(years);
foreach (int y in years)
{
    Console.WriteLine(y);
}

Now, are we able to at least find the length of a multi-dimensional C# array? Yep!

Console.WriteLine();

Console.WriteLine(years.Length);

8

Granted, the Length method will return the total number of elements in a multi-dimensional C# array (8 in this case) as opposed to say, something like (2, 4)-which would imply a 2×4 array.

Here’s the code on the GitHub-https://github.com/mfletcher2021/blogcode/blob/main/MultiDimensionalArrays.cs (the error-yielding Sort/Reverse code has been removed, but if you wish to test it, feel free to plug it back in anywhere on the code)

Thanks for reading,

Michael

[“C#”, “Arrays”, “Lesson”, “part”, “1”]

Advertisements

Hello everybody,

Michael here, and this post will be a part 1 of my C# array exploration, covering 1-dimensional arrays!

You could say this array moves in 1, 2 step.

What are arrays? Well, you’ve likely seen me cover them in Java and Python-arrays basically store lists of values in your code. The values could be of any type-strings, integers, etc.

For a refresher, here’s what arrays look like in Python:

pythonArray = ['test1', 'test2', 'test3', 'test4', 'test5']

And here’s what arrays look like in Java:

String[] javaArray = {'test1', 'test2', 'test3', 'test4', 'test5'};

[“C#”, “1-dimensional”, “arrays”]

Now, the first thing I will show you how to do is make a simple 1-dimensional array in C#. Take a look at this example:

string[] languages = ["Python", "R", "Java", "MySQL", "CSS", "Bootstrap", "HTML", "C#", "GitHub"];
Console.WriteLine(languages[2]);

Java

How does this simple C# array work? Here’s what you should keep in mind:

  • C# arrays are created like Java arrays; both types of arrays are created using this structure-value type[] arrayname = [elements];.
  • If there’s anything C#, Java, and Python arrays have in common, it’s the 0-indexing system (as in, the first element of an array is always index-0).

In this example, I created an array that stores all the programming languages I’ve covered on this blog and accessed the third element of that array by using languages[2]. In this example, the third element of my languages array is Java.

[“C#”, “arrays”, “sorted”]

Now that we’ve explored basic C# arrays, how can we sort them alphabetically? Take a look at this example:

Array.Sort(languages);
Console.WriteLine();

foreach (string l in languages)
    {
    Console.WriteLine(l);
}

Bootstrap
C#
CSS
GitHub
HTML
Java
MySQL
Python
R

Now, how did I manage to sort the languages array? C# has a method for array sorting aptly called Array.Sort() which allows me to sort the languages array alphabetically.

As for the foreach loop, consider this a preview for my eventual C# loops lesson (and don’t worry-I’ll explain the idea of loops in greater detail). If you understand the idea of loops from other programming tools, you could probably guess that the foreach loop here is basically iterating though the sorted languages array and printing out each element one by one in alphabetical order.

Now, what if we wanted to sort this array the other way around-i.e. in reverse alphabetical order? Here’s how we’d do so:

Console.WriteLine();
Array.Reverse(languages);

foreach (string l in languages)
{
    Console.WriteLine(l);
}

R
Python
MySQL
Java
HTML
GitHub
CSS
C#
Bootstrap

It’s literally like what we did before-the only difference is that you’d use the Array.Reverse() method to sort the array in reverse order. And just like that, we see all the elements in the languages array printed out one by one in reverse alphabetical order.

  • Also, no need to worry about the Console.WriteLine() lines in this code, as I just used them to space out the output between examples since I’m using one script for each example.

[“C#”, “modifying”, “arrays”]

Last but not least, let’s see how we can modify arrays. Let’s change an element inside the array:

Console.WriteLine();
languages[2] = "JavaScript";
Console.WriteLine(languages[2]);

JavaScript

In this simple example, I changed the third element (index-2) of the array from Java to JavaScript. Pretty simple right?

Now, you may be wondering if we can add or remove elements inside a C# array. The simple answer to that question is sadly, no, because unlike arrays in Python (and perhaps other languages too), C# arrays have a fixed size, which means you cannot add or remove elements from an array once it’s been declared in C#.

[“C#”, “array”].length()

Last but not least, let’s see how long our C# array is:

Console.WriteLine();
Console.WriteLine(languages.Length);

9

By simply using the .Length method, you can see how long your C# array is. In this case, the languages array is of length 9.

As always, here’s the script that I used for this lesson-https://github.com/mfletcher2021/blogcode/blob/main/1darray.cs.

Thanks for reading,

Michael

A C# Switch (Statement)

Advertisements

Hello everybody,

Michael here, and in today’s post, we’ll present another type of conditional statement that serves as an alternative to the if-else statement-the switch statement.

Switch to the explanation

Now, what does the switch statement do and how does it differ from the if-else statement? Let’s analyze these similarities and differences:

  • Both the switch and if-else statements are conditionals, as both types of statements will execute certain sections of code based off of certain preprogrammed conditions.
  • To partition the code into sections based off of certain conditions, if-else statements would use brackets. Switch statements would use the case keyword (more on that later).
  • If-else statements are more versatile, as they can handle a wider range of logical operators (such as <, >, &, |, and !). Switch statements only work with constants (i.e. 3 or "four").

And now, a switch to the demo

Now let’s see a switch statement in action:

Console.WriteLine("Pick a number between 0 and 10");
String score = Console.ReadLine();
int scoreInt = int.Parse(score);
String review = "";

switch (scoreInt)
{
    case 0:
        Console.WriteLine("Unbearable");
        break;
    case 1:
        Console.WriteLine("Unbearable");
        break;
    case 2:
        Console.WriteLine("Painful");
        break;
    case 3:
        Console.WriteLine("Awful");
        break;
    case 4:
        Console.WriteLine("Bad");
        break;
    case 5:
        Console.WriteLine("Mediocre");
        break;
    case 6:
        Console.WriteLine("Okay");
        break;
    case 7:
        Console.WriteLine("Good");
        break;
    case 8:
        Console.WriteLine("Great");
        break;
    case 9:
        Console.WriteLine("Amazing");
        break;
    case 10:
        Console.WriteLine("Masterpiece");
        break;
}

Pick a number between 0 and 10
5
Mediocre

In this example, we’re asking the user to pick a number between 0 and 10 and-after parsing their input as an integer like we did with the examples in the previous post-printing an output on the console based off of the number that was typed. In this instance, I typed 5 and got the output Mediocre.

How does the script know which output to print onto the console. The 11 case statements in the script check the value the user inputted and determine what get printed to the console.

  • I based this example off of IGN’s rating scale-if you don’t know what IGN is, it’s partially a review site that reviews TV, movies, video games, comic books and tech using a scale from 0-10 (10 being the best). Yes, both 0 and 1 are considered Unbearable on IGN’s rating system. It’s also partially a pop culture news site that delivers news on TV, movies, video games, comic books and tech.
  • Yes, I know a user can type in something other than a whole number from 0-10, but I can cover error handling in another lesson.

Keyword: break

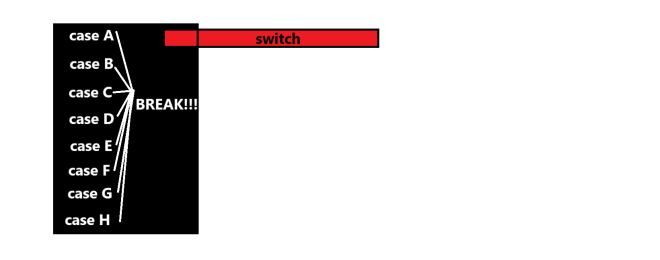
You likely also noticed something else in the example above-the keyword break. What does this keyword do? It simply tells the script to stop executing the switch statement code once a match is found.

Also, as always, here’s the link to the script in my GitHub-https://github.com/mfletcher2021/blogcode/blob/main/Switch.cs

Thanks for reading,

Michael

If, Else, C#

Advertisements

Hello readers,

Michael here, and in today’s post, we’re going to explore the wonderful world of if-else statements (aka conditionals) in C#.

Now, you’ve seen me cover conditionals in Java and Python, but let’s see how we do it in C#.

A truth tables refresher

One thing that is important when writing conditionals or Boolean statements in programming is the concept of truth tables, like so:

The three most common logical operators you will likely use when writing Boolean statements and conditionals in programming are & (and), | (or) and ! (not).

Here are some other things to keep in mind with truth tables:

  • In C#, much like in other programming tools we’ve covered, statements are read from left to right for the most part, so the leftmost Boolean statements will be evaluated first.
  • One exception to what I just mentioned-if you have a statement in parentheses, that will be the first one read. For instance, if your statement goes A & B | (C & D), C & D would be read first as it is the statement in parentheses.
  • Following what I just said, if you have several statements inside several nested parentheses, the innermost statement will be read first. For instance, if your statement goes A | B | C & (D & (E | F)), E | F would be read first as it is the statement in the innermost pair of parentheses.

A basic if-else statement, C# style

Now, how do we write a basic if-else statement, C# style. Take a look at my example below:

Console.WriteLine("Pick a number between 0 and 100");
String userNumber = Console.ReadLine();
int userNumberInt = int.Parse(userNumber);
String grade = "";

if (userNumberInt >= 70 | userNumberInt <= 100)
{
    grade = "pass";
}
else
{
    grade = "fail";
}

Console.WriteLine("Your grade is a " + grade);

Pick a number between 0 and 100
72
Your grade is a pass

Using the American school grading system as an example, in this script I ask the user for a number from 0 to 100, which represents possible class grades. If the number is between 70 and 100, the grade is set to pass (think of it as needing a C- to pass). Otherwise, the grade is set to fail (think of it as a D+ or lower is failing).

  • You might be wondering about the int.Parse([insert string here]) method. This is one way to convert strings in C# into integers. It’s also known by the name typecasting, much like in Python when we converted strings into integers simply by typing int([string here]).

If, Else, Nested, C#

Now, as we saw in some of the other tools I’ve covered, it is possible to nest if-else statements inside other if-else statements. How can we do so? Take a look at the code below:

Console.WriteLine("Pick a number between 0 and 100");
String userNumber = Console.ReadLine();
int userNumberInt = int.Parse(userNumber);
String grade = "";

if (userNumberInt >= 90 & userNumberInt <= 100)
{
    if (userNumberInt >= 97 & userNumberInt <= 100)
    {
        grade = "A+";
    }
    else if (userNumberInt >= 93 & userNumberInt <= 96)
    {
        grade = "A";
    }
    else
    {
        grade = "A-";
    }
}

else if (userNumberInt >= 80 & userNumberInt <= 89)
{
    if (userNumberInt >= 87 & userNumberInt <= 89)
    {
        grade = "B+";
    }
    else if (userNumberInt >= 83 & userNumberInt <= 86)
    {
        grade = "B";
    }
    else
    {
        grade = "B-";
    }
}

else if (userNumberInt >= 70 & userNumberInt <= 79)
{
    if (userNumberInt >= 77 & userNumberInt <= 79)
    {
        grade = "C+";
    }
    else if (userNumberInt >= 73 & userNumberInt <= 76)
    {
        grade = "C";
    }
    else
    {
        grade = "C-";
    }
}

else if (userNumberInt >= 60 & userNumberInt <= 69)
{
    if (userNumberInt >= 67 & userNumberInt <= 69)
    {
        grade = "D+";
    }
    else if (userNumberInt >= 63 & userNumberInt <= 66)
    {
        grade = "D";
    }
    else
    {
        grade = "D-";
    }
}

else
{
    grade = "F";
}

Console.WriteLine("Your grade is a " + grade);

Pick a number between 0 and 100
88
Your grade is a B+

In this example, I added more dimensions to the grade variable by adding different scenarios for this script. In other words, in this example the grade won’t simply be set to pass or fail but rather to a letter value based on the inputted number. For instance, inputting a 71 will yield a C- but a 78 will yield a C+. For this example, I chose 88 and got a grade of B+.

  • For all my non-American readers, there is no such thing as an F+ or F-, hence why I don’t have any nested conditionals for the F scenario. Anything under 60 would be a F in the American grading system.

Michael’s Programming Bytes 2025 Feedback

Hello readers,

Michael here, and I know the link to my survey that I put out in the previous post didn’t work (my apologies for that), but I would certainly appreciate it if you could take some time (not even 10 minutes) to complete my quick, easy-peasy 2025 feedback survey-https://forms.office.com/Pages/ResponsePage.aspx?id=DQSIkWdsW0yxEjajBLZtrQAAAAAAAAAAAAZ__sEfXLlUMUxENjZIN0IxWDlNODJWN0RKOVdFTlRGRy4u.

Rest assured, I’ll only use this data to help improve my slate of content going forward. That’s it. It’s my way of getting your feedback on my content slate.

Also, here is my script on GitHub-https://github.com/mfletcher2021/blogcode/blob/main/IfElse.cs. Both examples are on the same script, but I did note which code belongs to which example in the comments so if you wish to test out either example, feel free to comment out the code for the example your not testing.

Thanks for reading,

Michael

C# User Input And Your User Input For Possible 2025 Content

Advertisements

Hello everybody,

Happy new year! It’s Michael, and I hope you all had a very merry, very festive holiday season with your loved ones. I’m back from my holiday break and ready to open up the Michael’s Programming Bytes shop for 2025! I can’t wait to share all of the amazing content I have planned for this year.

So, how will I begin my blogging year? I’m going to demonstrate how to perform user input with C#!

C# User Input

Now, how do we perform user input with C#? Here’s a little demonstration:

// Asking user input for today's date
Console.WriteLine("Please enter today's date");
string todaysDate = Console.ReadLine();
Console.WriteLine("Today's date is: " + todaysDate);

Please enter today's date
January 7 2025
Today's date is: January 7 2025

Here we have a simple C# program asking for the user’s input for today’s date. All it took to make this program were three lines of code-one to ask the user to Please enter today's date, one to store the user’s input, and one to print out the user’s input along with the text Today's date is: . Pretty simple stuff right?

  • Yes, I know C# can do date-time formatting, much like other languages. However, I just used a string for the date for simplicity’s sake.

Your (User) Input For Michael’s Programming Bytes

Yes, I chose a demonstration on C# user input for my first 2025 post in part for a clever segue into another thing I want to do on this blog. I realized I’ve never tried to gather user/reader input during this blog’s almost 7-year run, so for the first time ever, I’m going to launch a survey to gather feedback from readers like you about your ideas, thoughts, and honest opinions on my content. I will take a look at the survey to shape my blog for 2025 and beyond.

Anyway, here’s the link to the survey. Feel free to complete it whenever you get a chance! I’m definitely curious as to what you think of my blog’s content run so far (and with 177 posts, there’s a lot of content to go around): https://forms.office.com/Pages/ResponsePage.aspx?id=DQSIkWdsW0yxEjajBLZtrQAAAAAAAAAAAAZ__sEfXLlUMUxENjZIN0IxWDlNODJWN0RKOVdFTlRGRy4u

Thank you for taking the time to fill out the survey! I can’t wait to share more amazing programming content with you all in 2025!

Also, here’s the link to this lesson’s C# script on my GitHub-https://github.com/mfletcher2021/blogcode/blob/main/UserInputTest.cs.

As always, thank you for reading!

Michael