Hello everybody,
Michael here, and today’s lessons will be on creating forms in HTML. Forms are used to process user input in HTML webpages.
Here’s a simple example of an HTML form:
<!DOCTYPE html>
<html lang="en" dir="ltr">
  <head>
    <meta charset="utf-8">
    <title></title>
  </head>
  <body>
    <h1>Here's an HTML form:</h1>
    <form>
      <label for="first">Please enter your first name:</label><br>
      <input type="text" id="first" name="first"><br>
      <label for="last">Please enter your last name:</label><br>
      <input type="text" id="last" name="last"><br>
      <br>
      <input type="submit" value="Submit">
    </form>
  </body>
</html>

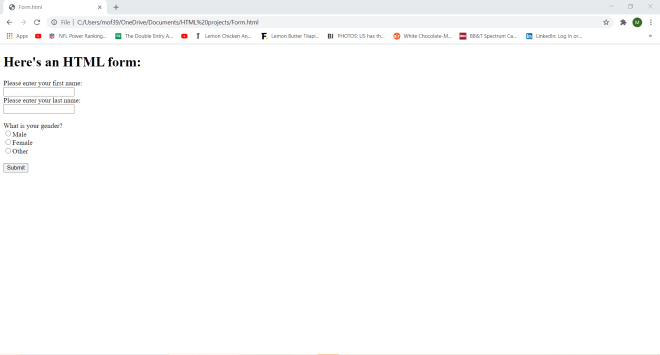
In this example, I created a simple HTML form where a user enters their first and last name and clicks the submit button. Granted, nothing will happen when I click the submit button since I didn’t program the button to do anything once it’s clicked, but I just wanted to include it here to show you all a simple example of an HTML form.
Anyway, what do all of the form tags I used mean? Let’s break it down:
- To create the form, I use the
<form>tag. I will also wrap all of the forms elements in this tag. - For the text boxes where the user enters their first and last name, I used the
<input>tag for each of them and set the input type astext(which indicates a textbox input). - I also added labels on top of each of the text boxes with the
<label>tag. - To create the submit button, I used another
<input>tag but set the input type assubmit. - As for the
forlabel parameter, its value should be equal to theidvalue on the corresponding input element in order to connect the label with the corresponding input.- Specifying the
forandidparameters will be especially important in CSS (which I’ll discuss more when I do my CSS series).
- Specifying the
Now, let me show you a more complicated HTML form example:
<!DOCTYPE html>
<html lang="en" dir="ltr">
  <head>
    <meta charset="utf-8">
    <title></title>
  </head>
  <body>
    <h1>Here's an HTML form:</h1>
    <form>
      <label for="first">Please enter your first name:</label><br>
      <input type="text" id="first" name="first"><br>
      <label for="last">Please enter your last name:</label><br>
      <input type="text" id="last" name="last"><br>
      <br>
      <label for="gender">What is your gender?</label><br>
      <input type="radio" id="gender" name="gender">Male<br>
      <input type="radio" id="gender" name="gender">Female<br>
      <input type="radio" id="gender" name="gender">Other<br>
      <br>
      <input type="submit" value="Submit">
    </form>
  </body>
</html>
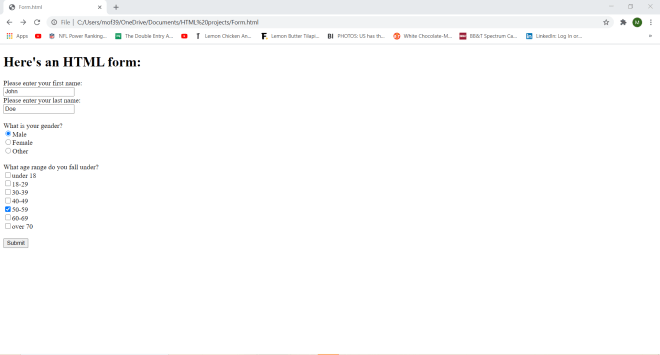
I expanded upon the previous example by adding some radio buttons to the form. Radio buttons are ideal if you want the user to only select ONE of several different choices; in this example, I added three radio buttons with the values Male, Female, and Other each wrapped in an <input> tag with type radio. I also added a corresponding label and specified the for parameter of the label along with the id parameter of each radio button in order to connect the label with each of the radio buttons.
- If you want multiple radio buttons, you’ll unfortunately need to type them out 1-by-1. HTML doesn’t yet allow you to group several radio buttons inside a single input tag.
Now, let’s add some checkboxes to the form:
<!DOCTYPE html>
<html lang="en" dir="ltr">
  <head>
    <meta charset="utf-8">
    <title></title>
  </head>
  <body>
    <h1>Here's an HTML form:</h1>
    <form>
      <label for="first">Please enter your first name:</label><br>
      <input type="text" id="first" name="first"><br>
      <label for="last">Please enter your last name:</label><br>
      <input type="text" id="last" name="last"><br>
      <br>
      <label for="gender">What is your gender?</label><br>
      <input type="radio" id="gender" name="gender">Male<br>
      <input type="radio" id="gender" name="gender">Female<br>
      <input type="radio" id="gender" name="gender">Other<br>
      <br>
      <label for="age">What age range do you fall under?</label><br>
      <input type="checkbox" id="age" name="age">under 18<br>
      <input type="checkbox" id="age" name="age">18-29<br>
      <input type="checkbox" id="age" name="age">30-39<br>
      <input type="checkbox" id="age" name="age">40-49<br>
      <input type="checkbox" id="age" name="age">50-59<br>
      <input type="checkbox" id="age" name="age">60-69<br>
      <input type="checkbox" id="age" name="age">over 70<br>
      <br>
      <input type="submit" value="Submit">
    </form>
  </body>
</html>

To add checkboxes to an HTML form, set the input type of the <input> tag to checkbox and in order to create a group of checkboxes, set the id parameter of each checkbox to be equal to the for parameter of the corresponding <label> tag.
- The
<label>tag is optional, but if you choose not to include a<label>tag (or even if you did), use the same value for theidparameters for all of your checkboxes.
Now that we’ve discussed some basic elements of HTML forms, there’s another point I want to bring up. All input elements in HTML must have a name attribute for their value to be submitted-though in this example, nothing happens when you hit the submit button.
Now, let me show you how to make something happen when you click the submit button; I’ll use the same code I used for the previous example but this time, I’ll add another HTML page-Submitted.html-that the user will be redirected to once they hit the submit button. Here’s the code for Submitted.html:
<!DOCTYPE html>
<html lang="en" dir="ltr">
  <head>
    <meta charset="utf-8">
    <title></title>
  </head>
  <body>
    <h1>Thank you for registering!</h1>
  </body>
</html>
And here’s the revised code for the previous example:
<!DOCTYPE html>
<html lang="en" dir="ltr">
<head>
<meta charset="utf-8">
<title></title>
</head>
<body>
<h1>Here's an HTML form:</h1>
<form action="Submitted.html">
<label for="first">Please enter your first name:</label><br>
<input type="text" id="first" name="first"><br>
<label for="last">Please enter your last name:</label><br>
<input type="text" id="last" name="last"><br>
<br>
<label for="gender">What is your gender?</label><br>
<input type="radio" id="gender" name="gender">Male<br>
<input type="radio" id="gender" name="gender">Female<br>
<input type="radio" id="gender" name="gender">Other<br>
<br>
<label for="age">What age range do you fall under?</label><br>
<input type="checkbox" id="age" name="age">under 18<br>
<input type="checkbox" id="age" name="age">18-29<br>
<input type="checkbox" id="age" name="age">30-39<br>
<input type="checkbox" id="age" name="age">40-49<br>
<input type="checkbox" id="age" name="age">50-59<br>
<input type="checkbox" id="age" name="age">60-69<br>
<input type="checkbox" id="age" name="age">over 70<br>
<br>
<input type="submit" value="Submit">
</form>
</body>
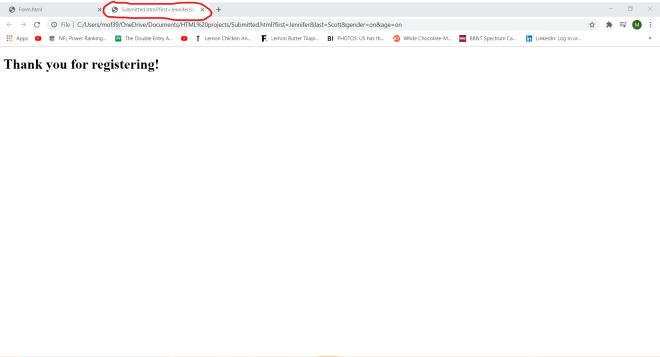
</htmlNow let’s fill out the form…
…and hit submit to see what happens:


Notice that the Forms.html code looks nearly identical to the Forms.html code from the previous example with one small change-the line <form action="Submitted.html">. The action parameter tells the form what to do once the submit button is clicked-in this case, the user will be redirected to the Submitted.html webpage where they will see the message Thank you for registering!.
- In the
<form action="...">line, I was able to simply writeSubmitted.htmlbecause I savedSumbitted.htmlandForms.htmlin the same directory on my computer. If you have two HTML files on your computer that you want to connect that are in different directories, you would need to specify the file path of the file that you want to connect to.
Whenever you use the action parameter to redirect the user to another webpage, by default, the new webpage opens in the same window where the current webpage is located. However, we can change that with the target parameter. Here’s how to do so:
<!DOCTYPE html>
<html lang="en" dir="ltr">
  <head>
    <meta charset="utf-8">
    <title></title>
  </head>
  <body>
    <h1>Here's an HTML form:</h1>
    <form action="Submitted.html" target="_blank">
      <label for="first">Please enter your first name:</label><br>
      <input type="text" id="first" name="first"><br>
      <label for="last">Please enter your last name:</label><br>
      <input type="text" id="last" name="last"><br>
      <br>
      <label for="gender">What is your gender?</label><br>
      <input type="radio" id="gender" name="gender">Male<br>
      <input type="radio" id="gender" name="gender">Female<br>
      <input type="radio" id="gender" name="gender">Other<br>
      <br>
      <label for="age">What age range do you fall under?</label><br>
      <input type="checkbox" id="age" name="age">under 18<br>
      <input type="checkbox" id="age" name="age">18-29<br>
      <input type="checkbox" id="age" name="age">30-39<br>
      <input type="checkbox" id="age" name="age">40-49<br>
      <input type="checkbox" id="age" name="age">50-59<br>
      <input type="checkbox" id="age" name="age">60-69<br>
      <input type="checkbox" id="age" name="age">over 70<br>
      <br>
      <input type="submit" value="Submit">
    </form>
  </body>
</html>
Now let’s fill out the form and see what happens:


Notice how Submitted.html opened in a new webpage. This is because I added the target parameter to the <form action = "..."> tag. Setting the target parameter to _blank opens the Submitted.html webpage in a new tab. There are four values that you can use for the target parameter, which include:
_blank-The value I used for this example_self-TheSubmitted.htmlwebpage would be displayed in the current window; this is the default value fortargetif nothing else is specified_parent-The form response is displayed in a parent frame_top-The form response is displayed in the body of the window
Next, let’s discuss the two methods for submitting form data-get and post. To better explain these two methods, I’ll fill in the form I’ve been using with new data and show you what happens when you use the get and post methods.
Here’s the code for Form.html using the get method (to add the method, all I needed to do was specify method="get" in the <form> tag:
<!DOCTYPE html>
<html lang="en" dir="ltr">
  <head>
    <meta charset="utf-8">
    <title></title>
  </head>
  <body>
    <h1>Here's an HTML form:</h1>
    <form action="Submitted.html" method="GET">
      <label for="first">Please enter your first name:</label><br>
      <input type="text" id="first" name="first"><br>
      <label for="last">Please enter your last name:</label><br>
      <input type="text" id="last" name="last"><br>
      <br>
      <label for="gender">What is your gender?</label><br>
      <input type="radio" id="gender" name="gender">Male<br>
      <input type="radio" id="gender" name="gender">Female<br>
      <input type="radio" id="gender" name="gender">Other<br>
      <br>
      <label for="age">What age range do you fall under?</label><br>
      <input type="checkbox" id="age" name="age">under 18<br>
      <input type="checkbox" id="age" name="age">18-29<br>
      <input type="checkbox" id="age" name="age">30-39<br>
      <input type="checkbox" id="age" name="age">40-49<br>
      <input type="checkbox" id="age" name="age">50-59<br>
      <input type="checkbox" id="age" name="age">60-69<br>
      <input type="checkbox" id="age" name="age">over 70<br>
      <br>
      <input type="submit" value="Submit">
    </form>
  </body>
</html>
And here’s what happens when I submit the form:
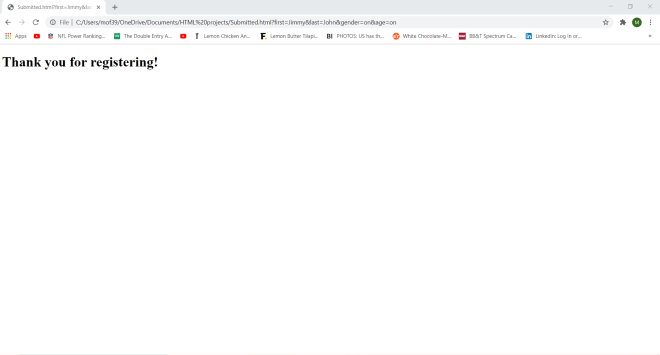
As you can see, we were redirected to the Submitted.html webpage. However, pay attention to this part of the URL:
Submitted.html?first=Jimmy&last=John&gender=on&age=onBoth the get and post methods will redirect you to the Submitted.html webpage after you click the submit button on the form, but only get will actually display all of the form data on the URL; the data is appended at the end of the URL after the name of the webpage (Submitted.html in this example) followed by a question mark.
- Security tip for you all-NEVER use the get method if your form has sensitive data (e.g. Social Security Numbers) as all of the data that is sent to the form will be visible in the URL!
Now let’s see what happens when you use the post method to submit this form:
<!DOCTYPE html>
<html lang="en" dir="ltr">
  <head>
    <meta charset="utf-8">
    <title></title>
  </head>
  <body>
    <h1>Here's an HTML form:</h1>
    <form action="Submitted.html" method="POST">
      <label for="first">Please enter your first name:</label><br>
      <input type="text" id="first" name="first"><br>
      <label for="last">Please enter your last name:</label><br>
      <input type="text" id="last" name="last"><br>
      <br>
      <label for="gender">What is your gender?</label><br>
      <input type="radio" id="gender" name="gender">Male<br>
      <input type="radio" id="gender" name="gender">Female<br>
      <input type="radio" id="gender" name="gender">Other<br>
      <br>
      <label for="age">What age range do you fall under?</label><br>
      <input type="checkbox" id="age" name="age">under 18<br>
      <input type="checkbox" id="age" name="age">18-29<br>
      <input type="checkbox" id="age" name="age">30-39<br>
      <input type="checkbox" id="age" name="age">40-49<br>
      <input type="checkbox" id="age" name="age">50-59<br>
      <input type="checkbox" id="age" name="age">60-69<br>
      <input type="checkbox" id="age" name="age">over 70<br>
      <br>
      <input type="submit" value="Submit">
    </form>
  </body>
</html>
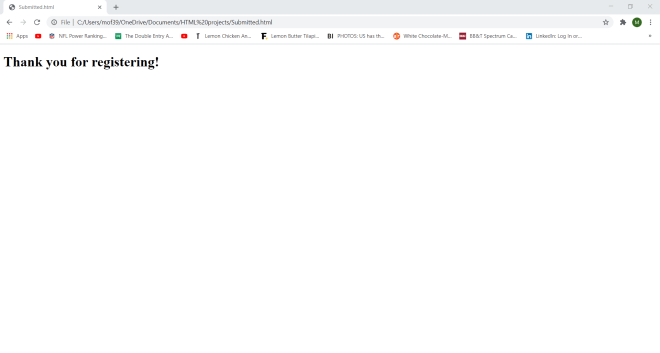
Now pay attention to the URL that’s shown on the Submitted.html webpage:
C:/Users/mof39/OneDrive/Documents/HTML%20projects/Submitted.htmlNotice that you don’t see any of the form data on the URL-this is because the post method does store the data you entered but doesn’t display that data on the URL.
- Get is the default method for storing form data, but once again, if you’ve got sensitive data on your form, use the post method!!!
Thanks for reading,
Michael