Michael here, and today’s post will cover how to understand color spaces in images.
Granted, I’ve previously discussed various colorscales you can find in computer programming in this post-Colors in Programming-but in this post, we’ll take a deeper dive into the use of colors in images.
But first, what is a color space?
Well, as the header above asks, what is a color space? In the context of images, a color space is a way to represent a certain color channel in an image.
Still confused? Let’s take the image we used in our first computer vision lesson (it can be found here Python Lesson 42: Intro To Computer Vision Part One-Reading Images (AI pt. 8)). Assuming we’re analyzing the RGB image of Orange Boy, the color spaces simply represent the intensities (or spaces) of red, blue and green light in the image.
And now let’s analyze colorspaces in OpenCV
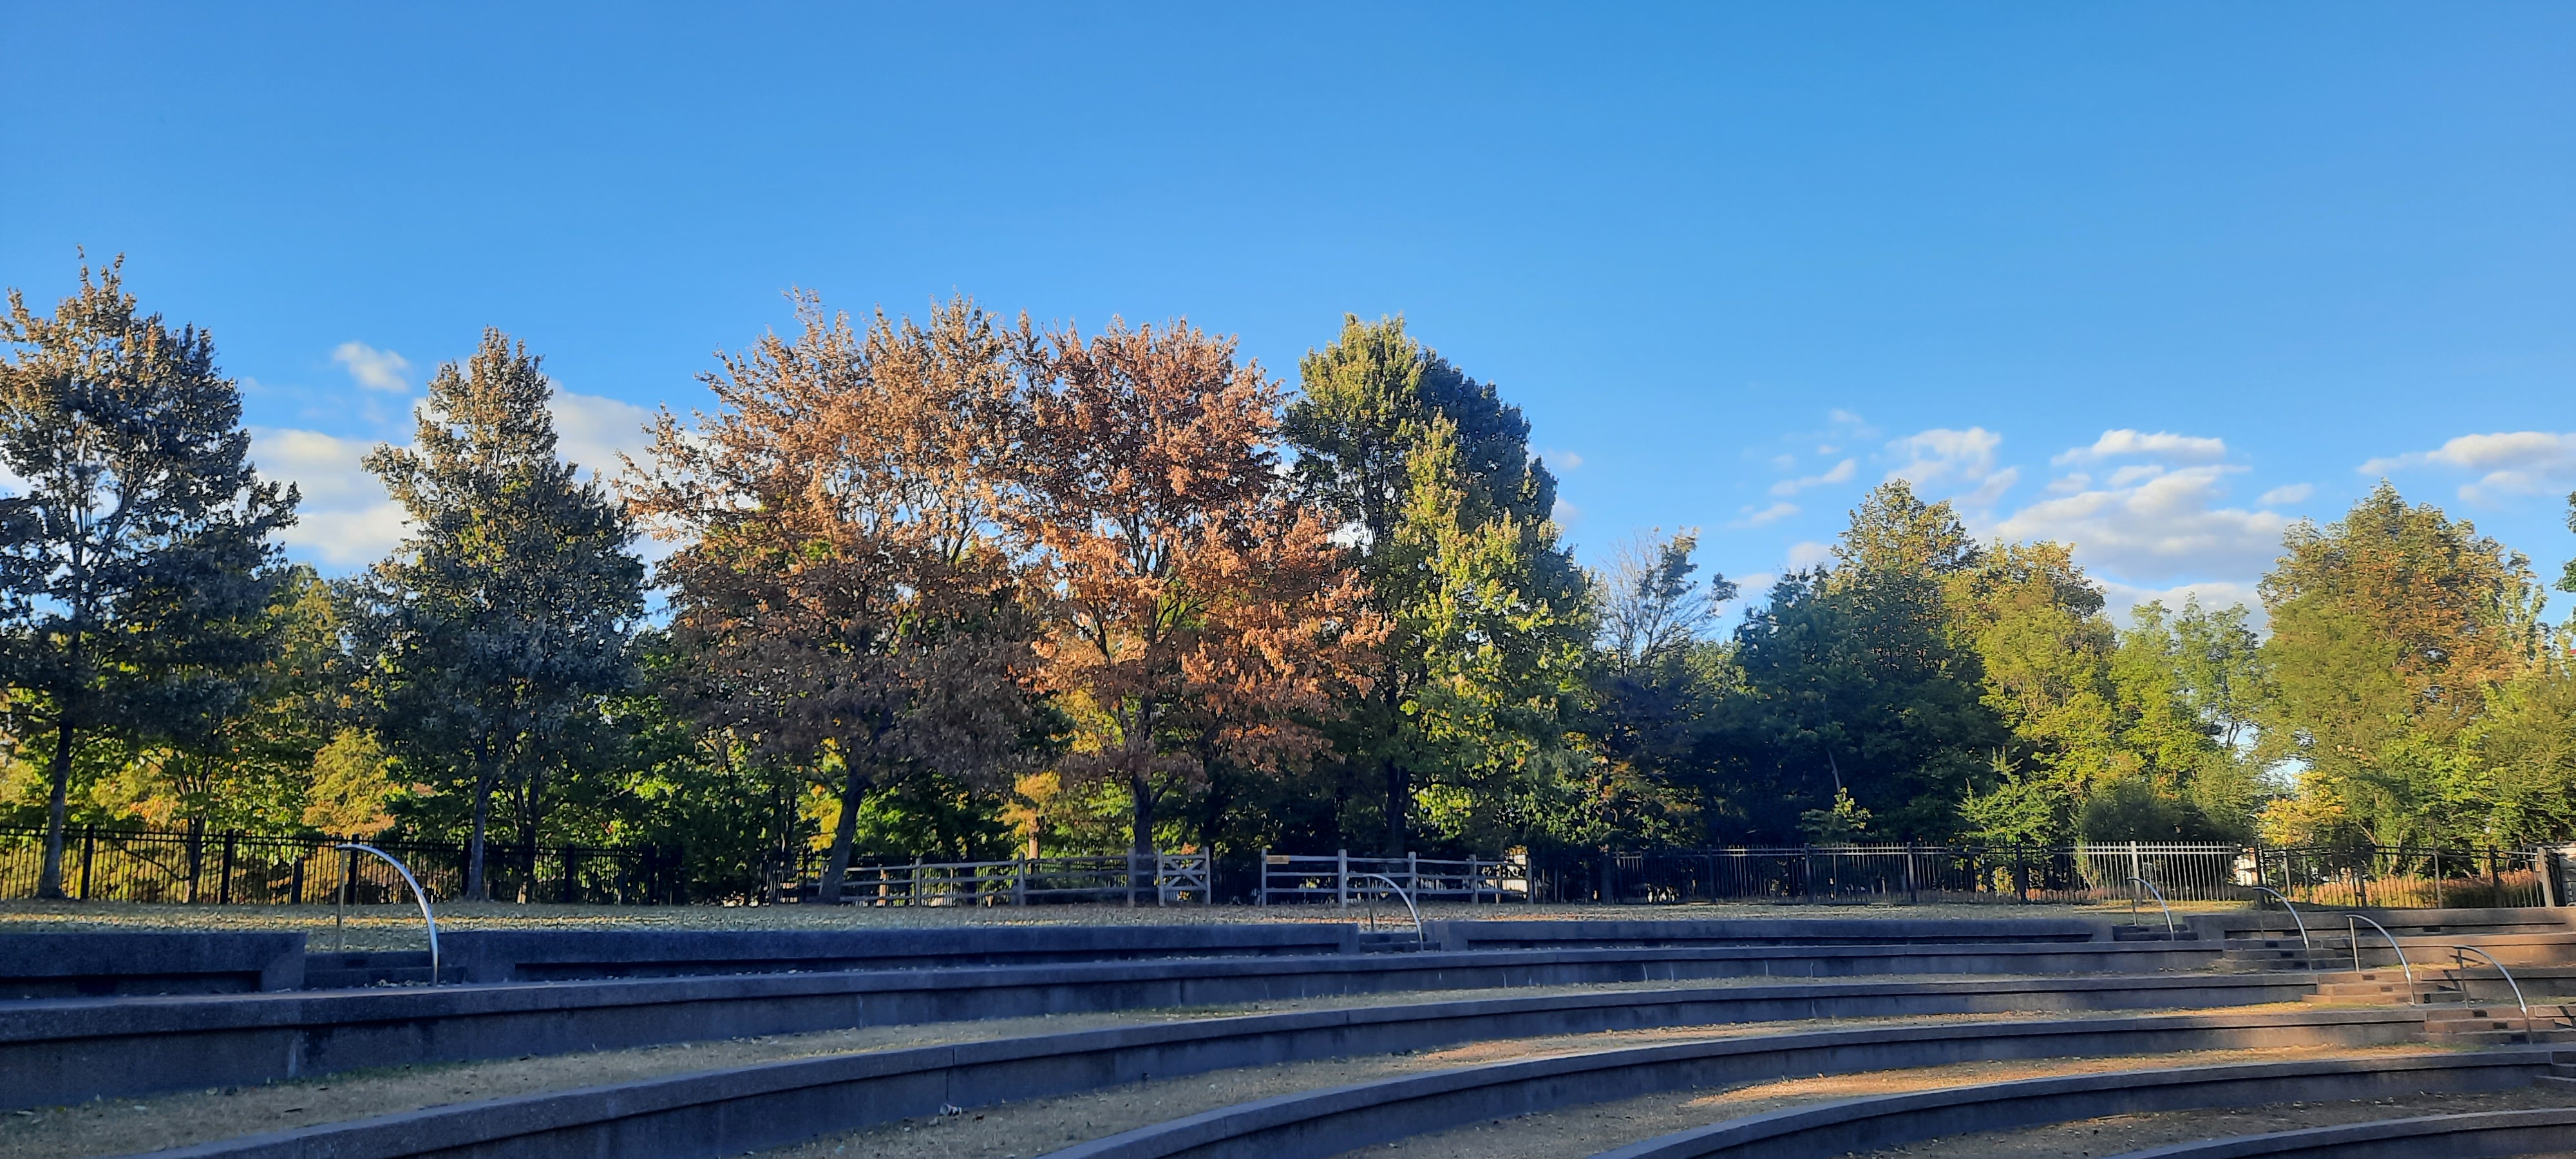
As the header says, let’s examine color spaces in Open CV! Here’s the image we’ll be using for this tutorial:
This is a photo of autumn at Bicentennial Capitol Mall State Park in Nashville, TN, taken in October 2022.
Before we start exploring colorspaces, let’s read in this image to our IDE using the RGB colorscale (which means you should remember to convert the image’s default colorscale):
Great! Now that we have our RGB image, let’s explore the different color channels!
First off, let’s examine this image’s red colorspace! How can we do that? Take a look at the code below:
B, G, R = cv2.split(park)
plt.figure(figsize=(18, 18))
plt.imshow(R, cmap='Reds')

plt.show()
In this example, I used the first line of code (the one with B, G, R) to split the image into three distinct colorspaces-blue, green and red.
Aside from the standard plt.figure() functions, I did make a slight modification to the plt.imshow() function. Instead of simply passing in the park image, I passed in the R variable so that we see the image’s red colorspace AND passed in the cmap parameter with a value of Reds to display the red colorspace in, well, red.
Now, how can we show the green and blue colorspaces? We’d use the same logic as we did for the red colorspace, except swap the R in the plt.imshow() function for G and B for the green and blue colorspaces and change the cmap values to Greens and Blues, respectively.
As you can see from all three of these color-altered images, the sky, park lawn, and buildings in the background are ceratinly more coloed than the trees, which look bright-white in all three color-altered images.
A little more on colorspace
Now that we’ve examined image colorspaces a bit, let’s see how we can find the most dominant color in an image! Take a look at the code below (which uses the park image):
Granted, you could realistically use a package like numpy to find the most dominant color in an image, but the colortheif module is a much more efficient (and more fun) approach.
In case you didn’t know, you’ll need to pip install the colortheif module.
After creating a ColorTheif object (and passing in the image’s filepath on your computer), you’ll then need to use the get_color() method and pass in quality=1 as this method’s parameter. Using the quality=1 parameter will extract the most dominant color in an image.
You can certainly use a variable to store the most dominant color like I did here (I used the dominantColor variable) but that’s completely optional.
Once you print the dominant color, you’ll notice you don’t get a color name, but rather a 3-integer tuple that represents the frequency of red, blue and green in the image (the tuple is based off of the RGB colorscale). In this case, our most dominant color is RGB(120, 94, 72). What does that translate to?
In plain English, the most dominant color in this image is a very desaturated dark orange. If you take a look at the original RGB image, it makes sense not only because of the color of the park lawn but also due to all the trees and buildings in the image.
What if you want to know not only the most dominant color in an image, but also its color palette? The colortheif module can help you there too! Here’s how:
Just as colortheif did with the most dominant color in an image, all colors are represented as RGB 3-integer tuples. The get_palette() function helps returns the top X colors used in the image-the X is represented by the value of the color_count parameter. In plain English, five colors used in this image include:
very desaturated dark orange (the most dominant color)
grayish blue
slightly desaturated blue
very dark almost black blue
slightly desaturated orange.
This feature is like imagining a painter’s palette in Python form-pretty neat right! As you can see, our painter’s paletter for the park image has a lot of blues and oranges.
Michael here, and in today’s post, we’ll continue our introduction to computer vision, but this time we’ll explore how to write images to a certain place on your computer using OpenCV.
Let’s begin!
Let’s write an image!
Before we begin, here’s the image we will be working with:
This is an image of Simba/Orange Boy and his sister Marbles (on Christmas Day 2017 excited to get their presents), both of whom got an acknowledgement in The Glorious Five-Year Plan Part Two.
Now, here’s the code to read in the image to the IDE:
You’ll first need to import the os module (or pip install it if you haven’t already done so)-this will help you write and save the image to a specific directory.
The two variables that follow-imagePath and imageDestination-represent the current location of the image on my computer and the location on my computer where I wish to write and save the image, respectively. In this case, my image is currently located in my Downloads folder and I wish to send it to my Documents folder.
The cats variable is the result of reading in the image of the cats to the IDE. The os.chdir() function takes in one parameter-the string containing the image destination path. This function will allow you to set the destination of the image to ensure that your image is written and saved to the location you set in the imageDestination variable.
The savedImage variable allows you to set both the image name and the image extension to the image you wish to save and write-in this case, my image will be named simbaandmarbles and it will have a jpg extension.
Last but not least, use the cv2.imwrite() function to write and save the image to your desired directory (represented by the imageDestination variable). You’ll notice that this function takes two parameters-savedImage and cats in this example-but why might that be? Take a look at the code above and you’ll see why!
See, savedImage is the name we’d like to use for the saved image-this is a necessary paramater because we want OpenCV to save the image using the name/extension we specified. cats saves the image itself to the desired location (or imageDestination).
You should certainly change the values of imagePath, imageDestination and savedImage to reflect accurate image locations/destinations/names/extensions on your computer!
But wait! How do we know if our code worked? Take a look at the output below:
True
Since the output of this code returned True, the image was succesfully written and saved to the desired destination on our computer! Want another way to verify if our code worked? Take a look at my Documents folder (which was my imageDestination):
As you can see, my image was succesfully written to my Documents folder with the name/extension I specified (simbaandmarbles/JPG).
Now we know the image was succesfully written and saved to the Documents folder, but how do we know if the rendering worked? In other words, did OpenCV zoom in or crop too much of the image (or change the colorscale during the writing/saving process)? Click on the image to find out:
As you can see, not only did OpenCV correctly write and save the image to the correct location, but it also wrote and saved the image without changing the zoom-in/zoom-out view or the image’s colorscale!
And that, dear readers, is how you can write and save an image anywhere on your computer using eight simple lines of code!
Michael here, and it looks like we’ve got quite a lesson today-we’ll be covering Jumbrotrons and carousels in Bootstrap!
Now, let’s begin with some Bootstrap Jumbotrons!
Bootstrap Jumbotrons
What is a Bootstrap Jumbotron? If you answer anything like a Jumbotron you’d see in sporting arenas, you are sort of right. While Bootstrap Jumbotrons aren’t as gigantic as their sporting arena counterparts, the general idea of both Jumbotrons is the same-to emphasize and call attention to specific content (whether it be a cheering crowd or webpage content).
Now, here’s a little quirk about Bootstrap Jumbotrons-there’s no longer a special class to create them in Bootstrap. See, Jumbotrons were introduced in Bootstrap 3-with their own Bootstrap class-as big padded boxes used to call attention to special webpage content. However, the Jumbotron class was phased out by Bootstrap 5 BUT even with that being said, you can still create Jumbotrons in Bootstrap through a clever combination of <div> tags and special Bootstrap classes. Let’s take a look at the code below to see how we can replicate a Jumbotron in Bootstrap 5:
<!DOCTYPE html>
<link href="https://cdn.jsdelivr.net/npm/bootstrap@5.2.0/dist/css/bootstrap.min.css" rel="stylesheet" integrity="sha384-gH2yIJqKdNHPEq0n4Mqa/HGKIhSkIHeL5AyhkYV8i59U5AR6csBvApHHNl/vI1Bx" crossorigin="anonymous">
<script src="https://cdn.jsdelivr.net/npm/bootstrap@5.2.0/dist/js/bootstrap.bundle.min.js" integrity="sha384-A3rJD856KowSb7dwlZdYEkO39Gagi7vIsF0jrRAoQmDKKtQBHUuLZ9AsSv4jD4Xa" crossorigin="anonymous"></script>
<head>
  <body>
    <div class="mt-4 p-5 bg-light text-black">
      <h1>Michael's photos</h1>
      <p>Photos of me from my phone's camera roll</p>
    </div>
  </body>
</head>
The line mt-4 p-5 bg-primary text-white rounded is made up of a combination of several different Bootstrap helper classes, which I’ll cover in future Bootstrap posts.
As you can see, using several Bootstrap helper classes (along with an <h1> and <p> tag), I managed to replicate a Bootstrap Jumbotron. Pretty simple stuff right?
Now that Jumbotrons have been covered, let’s move on to our next topic for today-Bootstrap carousels.
Carousels
No, we’re not going to ride the state fair’s merry-go-round here today (though wouldn’t that be fun). Rather, we’re going to discuss the image carousel, which is a feature used in webpage design that serves as a slideshow (or “carousel”) of images.
How would we implement the carousel in Bootstrap? Pay attention to the highlighted section of code below:
Yes, I did change the Jumbotron message from the previous example, but that’s irrelevant here.
The carousel elements, explained
So, how was I able to create the carousel? First, pay attention to the <div id="demo" class="carousel slide" data-bs-ride="carousel"> line. This line creates the carousel by using the Bootstrap class carousel slide and initializes the carousel with the data-bs-ride="carousel" line; the purpose of including this line is to include the ability to jump from image to image in the carousel.
The four following lines of code create buttons that allow you to jump from image to image on the carousel. Pay attention to this chunk of code-data-bs-slide-to="0", as it’s repeated four times-one for each of the four images I’ve included in this carousel. The only difference in the four instances of this line is that “0” is replaced with “1”, “2”, and “3”, which allow you to naviagate to the second, third, and fourth images in the carousel, respectively. Also, in the line of code to create the first button (the line that contains data-bs-slide-to="0"), you’ll also see a chunk of code that says class="active"-this indicates the carousel’s default image (in other words, the first image you’ll see on the carousel when you open the webpage).
Why is the value of the first data-bs-slide-to set to 0 while the value of the last data-bs-slide-to set to 3, even though there are four images in the carousel? This is because, when building a Bootstrap carousel, 0 refers to the first image-thus, 3 would refer to the fourth image. Zero-indexing system at work, much like in Python!
After adding the buttons, you’ll need to add another div class-carousel-inner. This is the fun part of the carousel, as this section of code actually adds your images to the carousel. All images except for the default image must have the class carousel-item, though the default image must have the class carousel-item active; this way, Bootstrap knows which image to display upon a user’s arrival to the webpage.
As for the image source (or src), if you have your images in the same directory as your HTML/CSS code, all you need to do to include the image onto the carousel is write src="[image name].[image extension]". If your images are in a different directory than your HTML/CSS code, you’ll need to include the image’s whole file path in the src parameter.
After including the images, the last thing you’ll need to add to the carousel are the Back and Next buttons, which can be accomplished with the carousel-control-prev and carousel-control-next classes and their corresponding <span> tags. Why do each of these classes need their own <span> tags? All the carousel-control-prev and carousel-control-next classes do is add the functionality to go back and forth in the carousel. However, simply having the functionality to go back and forth isn’t enough on its own-after all, how can you expect the user to navigate back and forth in the carousel if they don’t want to use the tiny rectangular buttons on the bottom of the carousel? That’s where the <span> tags come in, as they link to the aforementioned functionalities to display two icons on the center-left and center-right hand sides of the carousel to allow the user to easily navigate back and forth through the carousel.
Honestly, you only need either the small rectangluar buttons or the Back and Next buttons in the carousel-you don’t absolutely need to include both elements. The only reason I did so is to teach you guys the basics of developing a Bootstrap carousel. Also, keep in mind that the differences between the small rectangular buttons and the Back/Next buttons is that the former option will allow you to jump all across the carousel (which can certainly help if you’ve got lots of images) while the latter option will only allow you to naviagate through the carousel one image at a time.
Re-sizing the carousel
Now, as you may have noticed from running the code, the carousel is looking a little big on the display. Let’s fix the sizing and fit the carousel to the screen with a little CSS magic:
By the way, this screen shot above is zoomed in at 100%.
Remember to save your CSS code in a CSS file and link it to your HTML/Bootstrap code-it would also be ideal to give your CSS file the same name as your corresponding HTML file.
Why would we need to set the height of all carousel elements (along with the larger HTML and body elements) to 100%? Doing so will ensure that all carousel elements fit within the entire screen without cutting off portions of the carousel.
Now, even though I said the carousel can now fit to screen once this CSS code has been added, you’ll notice that the CSS carousel doesn’t quite fit to screen. How do we fix this? Remove the Jumbotron!
Now the carousel fits within the screen 100% with no need for scrolling!
Carousel captions
Last but not least, let’s discuss how to add captions to the carousel. Honestly, the carousel looks great so far, but what would really improve it (and in turn, improve the user experience) are captions for each image to give the user an idea of what they’re looking at.
How would we add captions to the carousel? Take a look at the highlighted sections of code below:
The carousel sure is looking much nicer, isn’t it? After all, now the users know exactly what they are looking at. Without the captions, the users would’ve assumed that the four pictures above were of random outdoor spaces.
How did I get the captions on each slide of the carousel? Easy-below the line where you insert the image (the line with the <img> tag), insert another <div> tag and set the class as carousel-caption, which indicates that you’d like to add some captions to a particular slide.
As you can see in the above example, I added a <div class="carousel-caption"> line four times. If you’ve got multiple images you’d like to add captions to, you’ll need to add the <div class="carousel-caption"> line for each image.
Inside the <div class="carousel-caption"> tag, you can add the caption by using as many standard HTML tags as you wish (I used the <h2> and <p> tags). Keep in mind that the more HTML tags you use, the more lines the image’s caption will have.
If you want to code-along with this tutorial, any four JPG images will work. If you wish to use the images I used, you’ll find the links to download each image below.
Hope you all had a wonderful holiday celebration! I can’t wait to share all the amazing programming content I have for you this year!
For my first post of 2022, I will pick up I left off last year-we covered some basics of working with Java JFrames and also covered how to work with shapes and colors on the JFrame. Today’s post will cover how to add images to a JFrame.
Java applications (and applications in general) often use images on their GUIs. Before we start adding images to our JFrame, let’s create the JFrame window (this code will look familiar to you if you read my previous JFrame lesson):
public class Graphics101 {

    public static void main(String[] args) {
        JFrame frame = new JFrame("My first JFrame");
        frame.setSize(600, 600);
        frame.setDefaultCloseOperation(JFrame.EXIT_ON_CLOSE);
        frame.setVisible(true);
    }

}
As you can see, we have a basic 600 by 600 pixel window.
Now, how can we add an image to this window? Take a look at this code:
public class Graphics101 {

    public static void main(String[] args) {
        JFrame frame = new JFrame("My first JFrame");
        frame.setSize(600, 600);
        ImageIcon image1 = new ImageIcon("C:\\Users\\mof39\\Downloads\\xmas\\20211225_163232.jpg");
        frame.add(new JLabel(image1));
        frame.pack();
        frame.setVisible(true);
        frame.setDefaultCloseOperation(JFrame.EXIT_ON_CLOSE);
    }

}
Pay attention to these three lines of code:
ImageIcon image1 = new ImageIcon("C:\\Users\\mof39\\Downloads\\xmas\\20211225_163232.jpg");
frame.add(new JLabel(image1));
frame.pack();
The ImageIcon line stores the image I want to add as a variable; to add a new object of the ImageIcon class, I’d need to pass in the image’s file path (where it’s located on my computer) as the parameter for the object. The frame.add(new JLabel(image1)) line adds the image to my JFrame; the image1 variable is passed in as the parameter as an object of the JLabel class. The frame.pack() method simply tells Python to display the image on the JFrame.
If you’re trying to create an image to add to the JFrame, always create an object of the ImageIcon class-don’t use any other class to create an image to add to the JFrame.
Yes, I’m wearing a Santa hat in this photo (it was taken on Christmas Day 2021).
Now, even though we did successfully get the image displayed onto the JFrame, we’ve got an issue-the whole image won’t fit since it’s too big for the JFrame. How can we resize the image so that the whole image fits within the 600×600 pixel JFrame? Take a look at this code:
public class Graphics101 {

    public static void main(String[] args) {
        JFrame frame = new JFrame("My first JFrame");
        frame.setSize(600, 600);
        JLabel label = new JLabel();
        label.setIcon(new ImageIcon(new ImageIcon("C:\\Users\\mof39\\Downloads\\xmas\\20211225_163232.jpg").getImage().getScaledInstance(600, 600, Image.SCALE_SMOOTH)));
        frame.add(label);
        frame.pack();
        frame.setVisible(true);
        frame.setDefaultCloseOperation(JFrame.EXIT_ON_CLOSE);
    }

}
As you can see, I managed to get the whole image to fit into the JFrame. How did I do that? Pay attention to these lines of code:
The JLabel line simply tells Java to add a new JLabel object to the JFrame; I will store the image I want to display in this JLabel.
The JLabel object’s .setIcon() method is the most important method in this group, as it creates the ImageIcon and resizes it to fit the JFrame window (via the .getScaledInstance() method), all in the same line of code. Pretty impressive right?
Now, the .getScaledInstance() method takes in three parameters-the width you want to use for the image (in pixels), the height you want to use for the image (also in pixels), and the scaling algorithm you’d like to use to scale the image to the JFrame-of which there are five: SCALE_DEFAULT, SCALE_FAST, SCALE_SMOOTH, SCALE_REPLICATE, and SCALE_AREA_AVERAGING. Since my JFrame window is 600×600 pixels, I used 600 for both the width and height parameters.
In the .getScaledInstance() method, when you’re indicating the scaling algorithm that you want to use, always include Image. before the name of the scaling algorithm (e.g. Image.SCALE_SMOOTH).
The frame.add() method adds the JLabel object to the JFrame; since the resized image is stored in the JLabel object, the frame.add() method adds the resized image to the JFrame. Just as with the previous example, the frame.add() method is followed by the frame.pack() method, which displays the resized image onto the JFrame.
Looks much better. But what if you wanted to resize the image to different dimensions-dimensions that aren’t equal to the size of your JFrame window, in other words. Take a look at this code:
public class Graphics101 {

    public static void main(String[] args) {
        JFrame frame = new JFrame("My first JFrame");
        frame.setSize(600, 600);
        JLabel label = new JLabel();
        label.setIcon(new ImageIcon(new ImageIcon("C:\\Users\\mof39\\Downloads\\xmas\\20211225_163232.jpg").getImage().getScaledInstance(300, 300, Image.SCALE_SMOOTH)));
        frame.add(label);
        frame.pack();
        frame.setVisible(true);
        frame.setDefaultCloseOperation(JFrame.EXIT_ON_CLOSE);
    }

}
I used the same code for this example as I did for the previous example, however I did change the first two parameters of the .getScaledInstance() method from 600 and 600 to 300 and 300. You might think that this would simply resize the image, in which case you’d be half-right. The image is resized to 300×300 pixels, but so is the JFrame window. With that said, keep in mind that, whenever you want to resize an image to fit a JFrame, if the dimensions of your resized image aren’t the same as those of your JFrame window, the JFrame window will change its size to match the dimensions of the image set in the .getScaledInstance() method. In this example, since I changed the dimensions of the image to 300×300 pixels, the JFrame’s inital size settings (600×600) will be overwritten to 300×300 pixels.
Thank you for reading. I’ve got tons of great content for you all this year,
It’s Michael, and today’s HTML lesson will be on inserting images and tables into HTML.
As you have seen from the previous three lessons, there’s quite a bit you can do with HTML. Now let me show you how to include images in HTML. Here’s a simple example of how to do so:
<!DOCTYPE html>
<!DOCTYPE html>
<html lang="en" dir="ltr">
  <head>
    <meta charset="utf-8">
    <title></title>
  </head>
  <body>
    <h2>A photo of me on a basketball court:</h2>
    <img src="C:\\Users\\mof39\\OneDrive\\Pictures\\ball.png" alt="basketball court">
  </body>
</html>
In this example, I inserted the H2 line of “A blurry photo of me on a park basketball court” along with an image of me on a park basketball court (now you all get to see what I look like) onto my HTML webpage.
How did I get the image onto my webpage? Well, I used the HTML tag for images-<img>-and filled it in with the two necessary attributes-src for the file path of the image and alt for alternate text for the image.
Alternate text provides a user with a brief description of the image if the user can’t view it for any reason (such as slow connection, the user needs a screen reader, etc.).
The <img> tag is an empty tag since it only has attributes and no closing tag.
Adding an image to a webpage with HTML is fairly simple. What if you wanted to play around with the image’s height and width. Here’s how to do so (using the same image from the previous example):
<!DOCTYPE html>
<html lang="en" dir="ltr">
  <head>
    <meta charset="utf-8">
    <title></title>
  </head>
  <body>
    <h2>A photo of me on a basketball court:</h2>
    <img src="C:\\Users\\mof39\\OneDrive\\Pictures\\ball.png" alt="basketball court" style="width:300px;height:450px;">
  </body>
</html>
For this webpage, I used the exact same code I used in the previous example, however I did add the style attribute to the <img> tag. In the style attribute, I specified the height and width I wanted for the image in pixels (all sizes in HTML are measures with pixels or px). I then refreshed the webpage and VOILA-you get to see the manipulated image. Notice how all I did was simply manipulate the image’s size-I didn’t crop it at all (I’ll likely cover image cropping when I start posting CSS content).
Instead of doing the width:X;height:X; thing I did to specify the image’s width and height, you could also list the width and height separately like this-width="300", height="450". However, using the style attribute is an efficient shortcut.
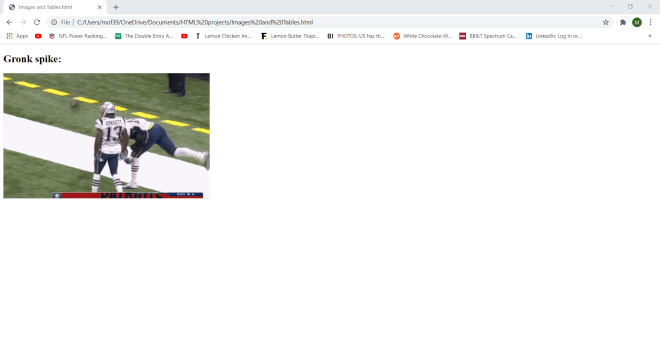
Now, one thing you probably didn’t know about HTML images is that you can also post animated GIFs (Graphics Interchange Format) to your HTML webpage. Here’s how to do so:
To add a GIF to the webpage, I used the same <img> tag that I would with normal images and included both the src and alt attributes.
Also, since I can’t show the GIF animation with a webpage screenshot, here’s the Gronk spike GIF in all its glory (FYI, I don’t own any of the GIFs/images I’ll be using):
Pretty neat stuff so far, right? Well, now let me show you how to use an image as a link to another website:
<!DOCTYPE html>
<html lang="en" dir="ltr">
<head>
<meta charset="utf-8">
<title></title>
</head>
<body>
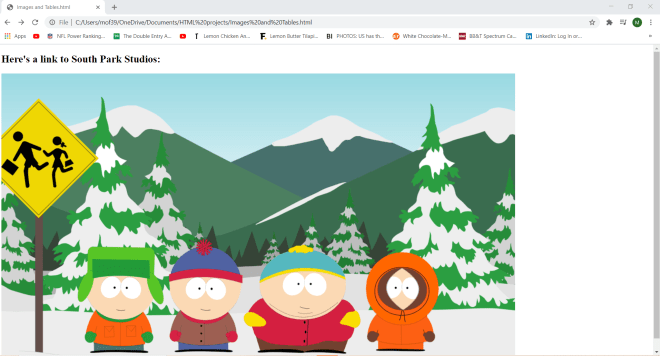
<h2>Here's a link to South Park Studios:</h2>
<a href="https://southpark.cc.com/">
<img src="C:\\Users\\mof39\\OneDrive\\Pictures\\south park.png" alt="The four main characters on South Park">
</a>
</body>
</html>
And here’s what happens once you click the image:
In this example, the image serves as a link to the South Park Studios website. In order to make an image a link, wrap the <img> tag and its attributes in an <a> tag-the <a> tag is typically used for links (which I’ll cover more in the next post). The <a> tag has an attribute-href; set the value of this attribute to the website/webpage you want to link to.
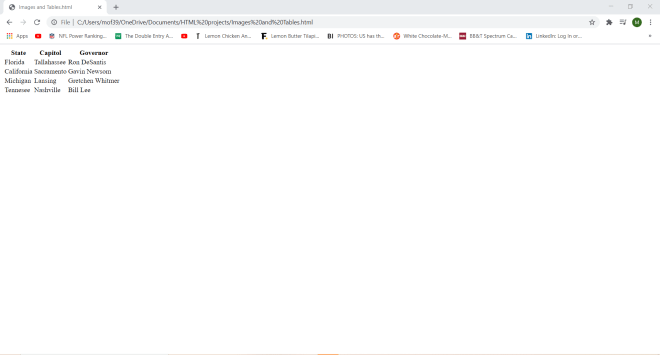
Alright, now that we’ve covered the basics of using images with HTML, now let’s cover creating tables in HTML. Here’s a simple example of HTML tables:
As you can see here, I have created a simple HTML table. How did I make this table? Well, all tables in HTML use these four tags-<table>, <tr>, <th> and <td>. The <table> tag creates the table itself, <tr> creates the table rows, <th> creates the table headers, and <td> creates the table details (these are the main non-header elements of the table).
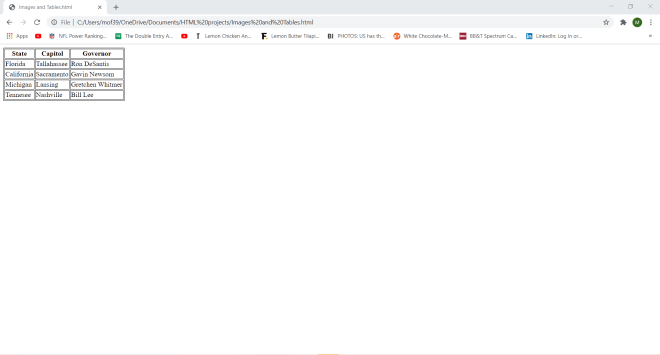
OK, this is a great start. But how would I add borders to the table? Here’s how:
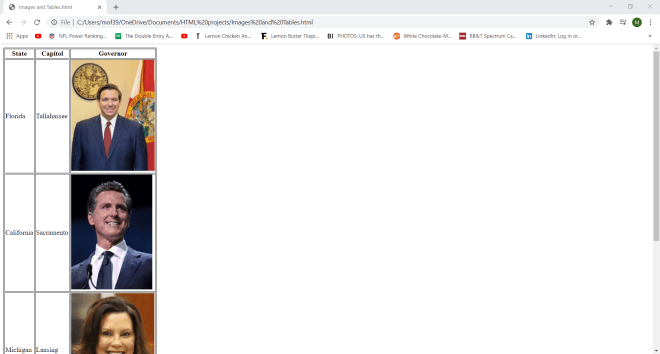
In this example, I simply replaced each governor’s name with their image (using a file path from my computer). Yes, you can use images as table elements in HTML (just remember to use the <img> tag).
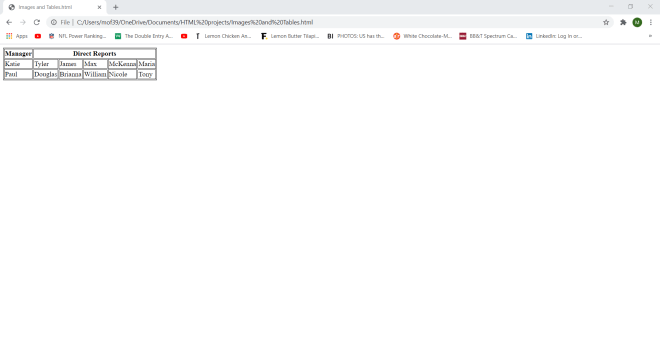
Now, let’s say you wanted a table with a cell that spans several columns. Here’s how to create one:
To create a table with a cell that spans several columns, you would need to specify which table header you want to span several columns-in this example, the Direct Reports header will span several columns. To specify how many columns you would like to stretch a cell, use the colspan attribute inside the <th> tag of the column you want to expand; in this example, I stretched the Direct Reports cell for 5 columns.
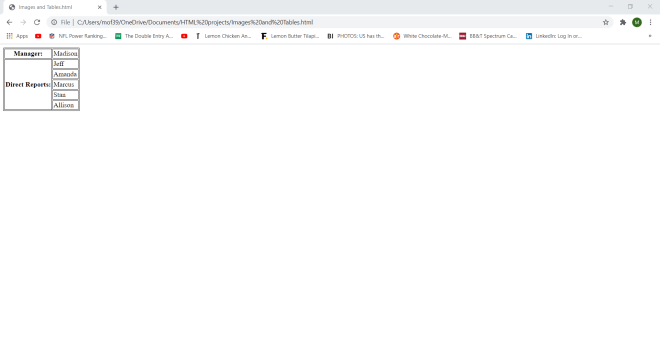
Now, what if I wanted to stretch a table cell for multiple rows? Here’s how to do so:
This example is conceptually identical to the previous example (since both tables show a manager and their direct reports). However, this table shows the manager in one row and their direct reports on six different rows.
So, where did I make a cell span multiple rows? Take a look at the Direct Reports cell. I wrapped this cell in a <th> tag and use the rowspan attribute to make the cell span five rows (one for each of the manager’s direct reports). In order to show all of the direct reports in five different rows, I had to wrap each name in its own <tr> tag. Note how I wrapped the first name-Jeff-in the same <tr> tag as the Direct Reports table header (this was important to do in order to ensure that the rowspan tool worked properly).
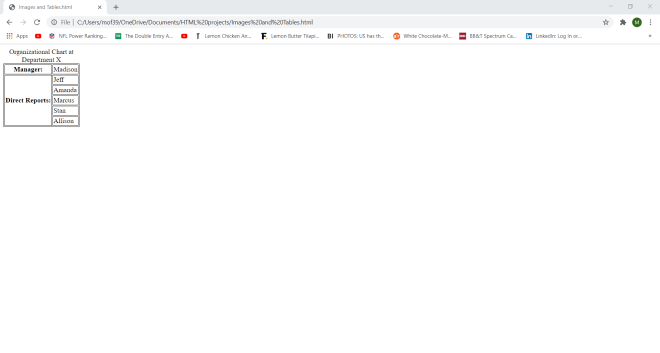
Now what if I wanted to add a caption to the table? Here’s how to do so (using the same table from the previous example):
To add a caption, all I did was wrap the caption I wanted to use inside a <caption> tag. When you’re adding a caption to your HTML table, remember to place the <caption> tag right after the opening <table> tag. The <caption> tag won’t work if you place it right before the closing </table> tag,


